Filing your Income Tax Return can help you plan for retirement. If you need professional help with the filing process, contact Eazy Startups, India, today.

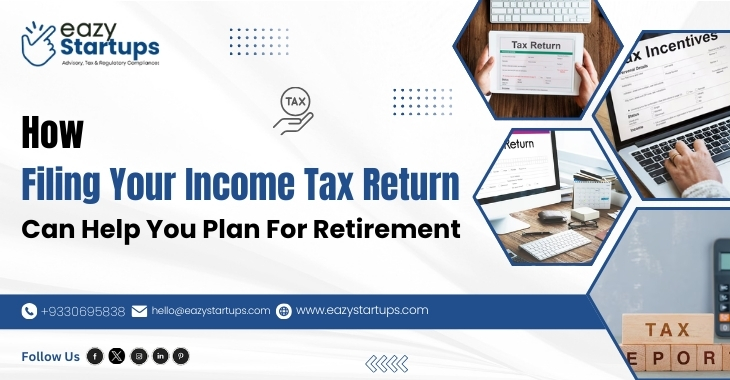
When it comes to retirement planning, many people think about savings, investments, and how much money they’ll need. However, one critical step frequently ignored is filing your Income Tax Return (ITR). Filing taxes is more than just paying what you owe. It can also be a valuable tool in your retirement planning. Here’s how.

1. Track Your Income and Expenses

2. Claim Tax Benefits on Retirement Plans

3. Build a Strong Financial Record

4. Track Your Investments

5. Avoid Penalties and Extra Costs

6. Access Government Schemes for Retirement Savings

7. Evaluate Your Retirement Progress


1. Track Your Income and Expenses

Filing your ITR gives a full breakdown of your income and expenses. It helps you understand your cash flow and allows you to develop a realistic budget. Knowing how much you make and spend allows you to determine how much you can save for

retirement and how much you should set aside each month to reach your objectives.


2. Claim Tax Benefits on Retirement Plans

Contributions to retirement savings in India, such as the Employees’ Provident Fund (EPF), Public Provident Fund (PPF), and National Pension Scheme (NPS), are tax-deductible under Section 80C. Filing your ITR ensures that these deductions are applied accurately. It lowers your tax liability, giving you more money toward your retirement savings.


3. Build a Strong Financial Record

Consistently filing your tax returns establishes a strong financial history. It is critical when asking for loans or potential financial assistance. Lenders and financial organizations review your tax return history to determine your credibility. A continuous ITR filing demonstrates that you are financially responsible and competent in managing finances, which is useful for retirement planning.


4. Track Your Investments

When you file your Income Tax Return, you disclose your investments and the income they generate, whether it’s interest from savings, dividends from equities, or mutual fund returns. It allows you to monitor your investments’ performance and whether they are

increasing sufficiently to fund your retirement plans. It also allows you to determine whether your present plan is consistent with your retirement goals.


5. Avoid Penalties and Extra Costs

Filing your ITR on time allows you to avoid penalty and interest charges. If you miss the deadline, the government may charge a late fee, which could deplete funds you could otherwise save for retirement. Submitting on time ensures that your tax-related chores are completed without incurring additional financial hardship.


6. Access Government Schemes for Retirement Savings

Certain government-sponsored schemes, such as the National Pension Scheme (NPS), require you to file an ITR to be eligible. These plans offer tax breaks and an organized way to invest for retirement. Filing your taxes regularly ensures that you can fully benefit from such schemes, which can greatly boost your retirement funds.


7. Evaluate Your Retirement Progress

Filing taxes regularly allows you to track your progress toward retirement. You can check your previous ITRs to see how well your savings and investments perform. Do you save enough? Are your investments delivering the expected returns? This review process allows you to make changes to ensure you’re on the correct track toward a secure retirement.


Conclusion

Filing your ITR is more than just a tax obligation; it’s an important step in retirement planning. You can ensure a more secure financial future by tracking your income, investing intelligently, and taking advantage of tax breaks. Make filing your ITR a regular practice and utilize it to help you plan, save, and invest successfully for retirement.

If you need professional guidance to avoid making mistakes while filing your Income Tax Return India, reach out to Eazy Startups today. Our skilled team of professionals will walk you through the procedure, assisting you in avoiding errors and maximizing the available deductions. You can trust us to ensure accurate and seamless tax filing. Get in touch with us right now!

Professionals make GST Registration Cancellation Online in India hassle-free. Contact Eazy Startups to get help with this process.

Opting for GST Registration Cancellation Online in India may appear easy, but several legal and regulatory requirements are involved. Improper execution may result in penalties, delays, or even the denial of your application. For this reason, hiring an expert, like a chartered accountant or a GST consultant, is easier and less complicated.

Let’s examine how experts can make GST cancellation simple and stress-free:-

1. Checking Eligibility for GST Cancellation

2. Gathering the Required Documents

3. Filing the GST Cancellation Application

4. Clearing Any Pending Tax Liabilities

5. Handling Government Queries and Notices

6. Ensuring a Smooth and Stress-Free Process 

Checking Eligibility for GST Cancellation:

Not all companies can revoke their GST registration at any moment. India’s GST law permits cancellation under the following circumstances:

  • The business has been closed or discontinued.
  • The annual turnover has fallen below the GST threshold (₹40 lakh for normal taxpayers, ₹20 lakh for special category states).
  • The business structure has changed due to mergers, transfers, or restructuring.
  • A voluntarily registered taxpayer wants to cancel after one year.

A professional reviews your case and ensures that you meet the eligibility criteria. It avoids unnecessary delays and increases the chances of approval. 

Gathering the Required Documents:

To cancel GST registration, you need to submit certain documents, including:-

  • PAN and Aadhaar of the business owner.
  • GST registration certificate.
  • Proof of business closure (if applicable).
  • Final GST return details (GSTR-10).
  • Details of any outstanding tax dues.

A professional ensures all documents are correctly arranged and uploaded on the GST portal. Missing or incorrect documents can lead to rejection, which they help avoid. 

Filing the GST Cancellation Application:

Businesses must use the GST site to file Form GST REG-16 online to cancel GST. The technical aspects of this process are bewildering to many business owners.

A professional completes the form accurately, ensuring all information is included, including stock details and tax responsibilities. It improves the likelihood of prompt GST department approval. 

Clearing Any Pending Tax Liabilities:

The GST department ensures that all outstanding taxes are paid before authorizing cancellation. If you have unpaid invoices, your application may be denied.

Experts help determine unpaid tax obligations and guarantee prompt payment. Additionally, they help file the final GST return (GSTR-10), which is required upon cancellation.

They assist in determining if any Input Tax Credits (ITCs) your company has claimed need to be reversed or if more tax needs to be paid. It avoids future legal problems. 

Handling Government Queries and Notices:

After submitting the GST Registration Cancellation application, the GST officer may request more information or explanations. Your application can be denied or delayed if you don’t answer correctly.

A specialist answers all of your questions and guarantees that the correct information is given. They also carefully monitor any follow-ups to prevent you from missing crucial deadlines.

Ensuring a Smooth and Stress-Free Process:

If you’re unfamiliar with tax rules, handling GST cancellation alone can be confusing and time-consuming. Errors in the paperwork or application may cause needless anxiety and delays.

Everything is handled by a professional, including eligibility verification and last-minute legalities. This allows you to concentrate on other crucial issues, saving you time and effort. 

Conclusion

In India, several procedures are involved in GST Registration Cancellation, such as eligibility verification, tax clearance, and legal compliance. A minor error could result in delays or legal issues. Hiring a GST consultant, tax counsellor, or chartered accountant is streamlined, error-free, and expedient.

If you want to cancel your GST registration stress-free, the best action is to get professional assistance. It gives you peace of mind, saves time, and guarantees compliance. So, reach out to our team of professionals at Eazy Startups if you want hassle-free GST Registration Cancellation Online in India. We handle everything from documentation to final approval, ensuring a smooth and stress-free process. Contact us today for expert assistance with GST cancellation!

If you want to apply for Online GST Registration in India, contact Eazy Startups. Our experts will help you to complete your registration successfully.

The Goods and Services Tax (GST) is a pivotal part of India’s tax structure, streamlining indirect taxes under one unified system. Businesses that fall into particular categories or reach certain turnover limits must register for GST. However, mistakes and oversights cause many business owners difficulties during registration. Avoiding frequent blunders can save time, effort, and penalties. If you want to apply for Online GST Registration in India, contact Eazy Startups.

Here are the top mistakes to avoid during GST registration:-

1. Providing Incorrect Business Details

2. Using incorrect Aadhaar or PAN information

3. Incorrect Selection of GST Category

4. Inaccuracies in Bank Account Information

5. Failure to Upload Proper Documents

6. Selecting the Incorrect SAC or HSN Code

7. Ignoring State-Specific Requirements

8. Extra Advice for Easy GST Registration

Providing Incorrect Business Details:

Giving inaccurate or insufficient business information is one of the most common errors while registering for GST. It covers mistakes in the business kind, legal name, or operational style. These errors may cause the application to be delayed or rejected.

Advice: Before submitting, confirm all business information, such as address, PAN (Permanent Account Number), and business structure (e.g., company, partnership, or sole proprietorship).

Using incorrect Aadhaar or PAN information:

The business’s PAN is connected to its GST registration; if the PAN is inaccurate, the application may be denied. Similarly, in certain situations, Aadhaar information is needed for identity verification.

Advice: Verify that the Aadhaar information matches the person’s formal records and that the PAN belongs to the appropriate legal organization.

Incorrect Selection of GST Category:

When registering, choosing the incorrect GST category may result in problems with compliance. Businesses may, for example, select “regular taxpayer” over “composition scheme” without fully comprehending the ramifications.

Advice: Recognize the distinctions between composition schemes and standard GST. Remember that the composition scheme has limitations, like no interstate trade, if you want to use it.

Inaccuracies in Bank Account Information:

Another frequent error is giving false information about a bank account or leaving out account details. For transactions and reimbursements, GST registration necessitates a working bank account; inconsistencies may lead to issues.

Advice: Provide accurate bank account information and documentation, like a cancelled check or bank statement. Make sure the company’s name appears on the account.

Failure to Upload Proper Documents:

To register for GST, you must upload several documents, including proof of address, identity, and business registration. Documents that are not full or that are not readable may be rejected.

Advice: Verify the list of necessary papers on the official GST portal and ensure they are readable, clear, and in the appropriate format (such as PDF or JPEG).

Selecting the Incorrect SAC or HSN Code:

Commodities and services are categorized using the Service Accounting Codes (SAC) and the Harmonized System of Nomenclature (HSN) for taxation purposes. Choosing the incorrect code may result in inaccurate GST rates and penalties.

Advice: To find your company’s right HSN or SAC code, consult the most recent GST standards. If necessary, consult a professional.

Ignoring State-Specific Requirements:

States have slightly different requirements for GST registration; some require extra information or paperwork. If state-specific regulations are ignored, approval may be delayed.

Tip: Verify compliance by researching state-specific GST regulations. For instance, Businesses with several branches in various states must register for separate GST registrations.

Extra Advice for Easy GST Registration

Timely Submission: To prevent missing deadlines, begin the registration process as soon as possible. Late registration may result in penalties.

Professional Assistance: Consult a trained GST consultant or chartered accountant if you are overwhelmed by the process.

Track Application Status: To ensure that problems are resolved as soon as possible, regularly check the status of your application on the GST portal.

Conclusion

GST registration is crucial for businesses, ensuring compliance and facilitating smooth operations under India’s tax regime. By following these tips and paying close attention to the process, you can complete your GST registration seamlessly and focus on growing your business. If you want to apply for Online GST Registration in India, contact Eazy Startups.

If you’re unsure about the process, consult with a professional GST advisor to handle your GST Registration Cancellation correctly.

For companies that no longer need a GSTIN (GST Identification Number), cancelling a Goods and Services Tax (GST) registration is an important procedure. The cancellation process must be conducted carefully, regardless of whether you’re shutting your company, merging, or dropping below the GST level. If this isn’t done, there may be fines, problems with compliance, or audit difficulties. Here are the main blunders you should avoid when requesting the GST Registration Cancellation to guarantee a seamless process.

Let’s delve into the topic:-

1. Ignoring Outstanding Liabilities

2. Not Submitting Complete Returns

3. Not Surrendering Input Tax Credit

4. Giving False Information

5. Canceling Registration Prematurely

6. Ignoring Follow-Up Notices from Tax Authorities

7. Misunderstanding the Cancellation Process

Ignoring Outstanding Liabilities:

Failing to settle all existing GST liabilities before filing for cancellation is one of the most frequent errors enterprises make. Businesses are required by the GST law to pay all of their debts, including unpaid taxes, interest, and penalties. Your application may be denied, and further penalties may be applied if you continue without settling any outstanding debts.

Tips: Before filing the cancellation request, create a final GST return and settle all outstanding balances.

Not Submitting Complete Returns:

Businesses must file a last return, GSTR-10, after electing to withdraw their GST registration. This necessary step is often missed by enterprises, which can cause the cancellation process to stall or be delayed. There is a ₹10,000 fee for not filing GSTR-10 within the allotted time.

Tip: File your final return within 3 months of cancellation approval or the order date, whichever is earlier.

Not Surrendering Input Tax Credit (ITC):

When a business cancels its GST registration, it frequently neglects to reverse its Input Tax Credit (ITC) on the capital goods or stock that was available. As part of the cancellation procedure, the ITC that was used for business purposes must be returned to the government or reversed.

Advice: Carefully calculate the ITC that will be reversed and include it in your final return (GSTR-10).

Giving False Information:

If the cancelation application contains errors, it may be rejected or subject to additional delays. Inaccurate GSTIN information, mismatched company names, and unfinished paperwork are examples of common mistakes, which result in more back-and-forth with tax officials.

Advice: Before submitting, double-check all of the information you enter in Form GST REG-16 and verify the accuracy and completeness of the supporting documentation.

Canceling Registration Prematurely:

Sometimes, companies quickly withdraw their GST registration without fully comprehending the repercussions. For example, even if business operations suddenly resume, a cancelled GSTIN cannot be utilized to issue invoices or collect ITC. Furthermore, some companies remove their GST registrations while liabilities or refund claims are still ongoing, which causes needless problems.

Advice: Confirm that your company no longer needs a GSTIN before requesting cancellation. Consider any anticipated refunds, liabilities, and pending returns.

Ignoring Follow-Up Notices from Tax Authorities:

Businesses may receive follow-up notices from tax authorities seeking further details or clarity after submitting a cancellation request. If you disregard these notifications, your application may be rejected.

Advice: Look for notifications on the GST portal. Answer questions or fulfill requests from authorities.

Misunderstanding the Cancellation Process:

Several procedures are involved in canceling a GST registration, including filing returns, clearing outstanding debts, and submitting an application. Many businesses make blunders because they don’t comprehend the legal requirements or actions needed.

Advice: Get acquainted with the procedure for cancelling GST and, if necessary, seek expert help. GST advisors can help you navigate the procedure and satisfy all conditions.

Conclusion

If done carefully and clearly, cancelling a GST registration can be simple. You can save time, money, and frustration by avoiding typical errors, such as forgetting to complete final returns, ignoring pending liabilities, or giving false information. Businesses can guarantee a smooth cancellation without incurring needless fines or rejections by being aware of the procedure and abiding by GST regulations. To get help with your GST Registration Cancellation, contact Eazy Startups.

Learn about the vital documents you need for Income Tax Registration. If you need professional assistance with this process, contact Eazy Startups, India.

Congrats if you intend to register for income tax; you’re making a significant move toward financial responsibility. Although it may seem intimidating, the procedure is rather easy if you know what to prepare for. It goes more smoothly and quickly if you have the appropriate paperwork ready. If you need professional assistance with your Income Tax Registration, Eazy Startups would be a great place to reach out. Our efficient teams of experts can help you with all the paperwork, making the whole process hassle-free. Contact us for more details.

Now, let’s review the seven key documents you will require to register your income tax:-

1. Your PAN Card

2. Aadhar Card

3. Proof of Address

4. Bank Account Details

5. Proof of Income

6. Your Photograph

7. Keep Digital Copies Ready 

Your PAN Card:

The most crucial document for income tax registration is your Permanent Account Number (PAN). It serves as an identity for all tax-related issues, guarantees no confusion, and links all of your financial transactions. Before beginning the registration process, apply for a PAN card if you don’t already have one. To prevent delays, ensure the information on your PAN corresponds with the information on the rest of your paperwork. 

Aadhar Card:

Almost everything, including taxes, is now connected to your Aadhar card by the government. In addition to confirming your identification, your Aadhar expedites the registration process. After registering, you will require it for e-verification. Verify again that your Aadhar information matches your PAN and is correct. To prevent issues, correct any mismatch first. 

Proof of Address:

When registering, you will need to present verification of a legitimate address. This might be your passport, voter ID, utility bill, rent agreement, or Aadhar card (assuming it includes the correct address). Proof of address guarantees that the tax department will know how to contact you in the event of correspondence. Outdated documents may cause problems, so keep an updated version handy. 

Bank Account Details:

Information about your bank account is necessary for Income Tax Registration. Your bank name, IFSC code, and account number must be entered. The tax department uses this information to validate your financial transactions and process refunds. Having your passbook or bank statement on hand is a smart idea while completing the registration form. Verify that the account is in your name and operational. 

Proof of Income:

Although it’s not usually required at the registration stage, having proof of income eventually helps. If you receive a salary, keep your Form 16 or pay stubs close at hand. Bank statements or income statements will work for freelancers or business owners. This document is important for registration and will also be helpful when you file your taxes. 

Your Photograph:

For Income Tax Registration, you might additionally want a passport-sized photo, particularly if you’re filling out paper forms or doing the process offline. Even though uploading a photo isn’t always necessary for online registrations, having one on hand is a good idea. Verify that the photo is current and corresponds with the identification documents you are presenting. A clear and polished photo can avoid unnecessary rejections or delays. 

Keep Digital Copies Ready:

Nowadays, the majority of the registration procedure takes place online. The process includes scanning and uploading papers. Verify that you have digital versions of each of these papers that are readable and clear. Put them in a folder so you can easily access them when needed. 

Final Thoughts

Having all the required paperwork makes the Income Tax Registration process simple. Start early and ensure everything is correct and current rather than waiting until the last minute to gather everything. Taking care of this stage helps you comply with the law and organize your finances. If you need professional help with this process or for Online Income Tax Filing in India, reach out to Eazy Startups today.

If you need help for GST Registration Online or GST Registration Cancellation Online, contact Eazy Startups.

Goods and Services Tax (GST) is a mandatory tax structure for businesses in India.It is imperative that you register each location under GST in accordance with the tax requirements if you operate in more than one place. Businesses can register more than one entity for different states or branches under the GST system. Avoiding legal issues and ensuring compliance with tax rules are two benefits of accurately registering under GST for various business locations. If you need help for GST Registration Online or GST Registration Cancellation Online, contact Eazy Startups.

Here’s a step-by-step guide on how to register for GST under multiple business locations:-

1. Understand the GST Registration Requirements

2. Open the GST Portal and log in

3. Select the Appropriate Business Category

4. Fill in Business and Location Details

5. Upload Required Documents

6. Verify and Submit the Application

7. Monitor Your Application’s Status

8. Receive the GST Registration Certificate

Understand the GST Registration Requirements:

You must determine whether your company needs several GST registrations before moving further with multiple location registrations. If your business operates in more than one state, you must obtain separate GST registrations for each state.

Open the GST Portal and log in:

Go to www.gst.gov.in, the official GST portal, to start the registration procedure. If your business is already registered, log in with your current GST login information. To apply for a new registration, go to the “New Registration” area and fill in the necessary information, including your business name, PAN, and operating state.

Select the Appropriate Business Category:

You must choose the right business category when registering for several locations. You must register in that state as a different business entity if you are requesting a separate GST registration for another state. Choose the option for numerous registrations under the same PAN if you are registering for many company verticals in the same state. Selecting the appropriate category is essential for accurate tax compliance and filing.

Fill in Business and Location Details:

After choosing the right category, you must enter your company’s information. This contains the company name, trade name, main office address, and information about other locations. You must submit the addresses and accompanying documentation for each location separately if you are registering for more than one in a different state. Delays in the approval process can be avoided by making sure the details are correct.

Upload Required Documents:

Depending on the region and business type, various documents must be uploaded in order to register for GST in several places. The PAN card of the business owner, proof of business address, bank account information, and the authorization letter, if the registration is being completed by an authorized representative, are frequently needed documents. You could be required to provide more paperwork, like financial documents and information about your company structure, if you are registering more than one vertical in the same state.

Verify and Submit the Application:

Verification comes next when all the relevant information has been entered and the needed documents have been uploaded. To guarantee validity, the application needs to be validated with either an Electronic Verification Code (EVC) or a Digital Signature Certificate (DSC). After verification, use the GST portal to submit the application. An Application Reference Number (ARN), which you can use to monitor the progress of your GST registration request, will be issued to you.

Monitor Your Application’s Status:

After submitting your application for GST registration, it’s critical to keep an eye on its progress. The GST portal’s “Track Application Status” section allows you to monitor the status using the ARN.

Receive the GST Registration Certificate:

The GST authorities will accept your application and issue a GST Registration Certificate following a successful verification process. Each registered location’s unique GST Identification Number (GSTIN) will be included in this certificate. You will be given distinct GSTINs for each location if you have registered more than one.

Conclusion

Businesses that operate in many states or oversee various business verticals must register for GST under multiple business locations. Businesses should keep abreast of the most recent GST regulations and get advice from a tax professional if necessary for a hassle-free registration process. If you need help for GST Registration Online or GST Registration Cancellation Online, contact Eazy Startups.

You must opt for expert help for GST Registration Online. If you need help for GST Registration Cancellation Online or registration, contact Eazy Startups.

Goods and Services Tax (GST) registration is a mandatory requirement for businesses meeting the threshold limit. Nonetheless, there can be circumstances in which a business owner must revoke their GST registration. A business closing, a drop in turnover below the taxable limit, or any other legitimate cause could be the cause of this. The good news is that the GST portal allows you to finish the full process online.  If you need help for GST Registration Cancellation Online, contact Eazy Startups.

Let’s dive into the discussion:-

1. Log in to the GST Portal

2. Access the Cancellation Form

3. Enter Business Details

4. Upload Required Documents

5. Verification of Application

6. Send in the application

7. Track Application Status

8. Obtain Verification

Log in to the GST Portal:

Logging into the official GST portal is the initial step in terminating your GST registration. To access your account, enter your registered username and password. After logging in, pick “Application for Cancellation of Registration” from the dropdown menu after clicking on “Registration” in the “Services” section. This will direct you to the online cancelation application form.

Access the Cancellation Form:

You will be taken to Form GST REG-16, which is intended especially for people who want to voluntarily cancel their GST registration, after choosing the cancellation option. Important information including your GSTIN (GST Identification Number), the cause for the cancellation, and the date you wish to cancel the registration will be requested on the form. To continue, carefully fill out these details.

Enter Business Details:

You must provide information about your company once the GST cancellation form is accessible. This contains your company’s legal name, trade name (if any), and the address of your main place of business. You can also be asked to provide information about any unpaid taxes, unfiled returns, or stock that was accessible on the cancellation date. At this point, giving correct information is essential to a seamless canceling procedure.

Upload Required Documents:

Depending on the cause for cancellation, you might need to include pertinent papers to support your application. You might have to file a declaration declaring that your business is shutting down if you are closing it. You might need to present financial papers as evidence if you are terminating your registration because your revenue has fallen below the GST threshold. Make sure that every document is scanned and uploaded in the correct format and within the portal’s allotted size.

Verification of Application:

Examine all of the information on Form GST REG-16 before submitting your application. Any mistakes or inconsistencies may result in processing delays or rejection. Verify that all necessary documents have been uploaded, the GSTIN is accurate, and the cancellation reason is legitimate. After making sure everything is correct, move on to the verification stage.

Send in the application:

Use the GST portal to submit the application when you have confirmed your information and authenticated it. An Application Reference Number (ARN) will be issued to you as confirmation of your request upon submission. You can monitor the progress of your cancelation application using this ARN. The tax authorities will assess your application after it is submitted.

Track Application Status:

It’s crucial to monitor the status of your cancellation request after submitting it. To accomplish this, log into the GST site and go to the “Services” section’s “Track Application Status.” To find out if your request has been accepted, is being reviewed, or needs more work, enter your ARN.

Obtain Verification:

The GST authorities will send you a confirmation as soon as your cancelation request is accepted. As evidence that your GST registration has been successfully canceled, you will receive the GST REG-19 certificate. This document should be preserved for future use as legal documentation.

Conclusion

Canceling your GST registration online is a simple yet essential process for businesses that no longer need GST compliance. By following the correct procedure, you can avoid unnecessary complications and ensure that your business remains legally compliant.If you need help for GST Registration Cancellation Online, contact Eazy Startups.

If you want Online Income Tax Registration, contact Eazy Startups for the best guidance and seamless process completion.

Have you ever wondered if you need to register for income tax? Well, if you earn money, chances are you might have to! Income Tax Registration is a crucial step to ensure you stay on the right side of the law. But don’t worry—it’s not as complicated as it sounds.

Let’s break it down so that it’s easy to understand and, more importantly, easy to follow!

1. If You Are an Earning Individual

2. If You Run a Startup or Own a Business

3. If You Are a Freelancer or Gig Worker

4. If You Make Money Investing

5. If You Are a Professional with a Private Practice

6.  If You Want to Apply for Loans or Credit

7. If You Want to Claim Tax Benefits

8. If You Have a Pension as a Senior Citizen

9. If You Earn from Foreign Sources

If You Are an Earning Individual:

You should determine whether your income surpasses the taxable limit if you are paid a salary, operating a business, freelancing, or generating money in any other manner. If your income exceeds a certain threshold determined by the government, you must register for income tax. It’s better to be safe than sorry, even if your income is barely cutting!

If You Run a Startup or Own a Business:

Managing a company? In that case, income tax registration is required rather than optional! You must register for taxes regardless of whether you own a tiny business, an internet company, or a full-fledged corporation. This is true for corporations, partnerships, and sole proprietors.

If You Are a Freelancer or Gig Worker:

Listen up, gig workers and freelancers! You are still subject to taxes even if you don’t have a 9–5 job. Your income is taxable from contracts, commissions, or projects. Therefore, it’s time to register and correctly submit your taxes if you earn a consistent income from freelancing.

If You Make Money Investing:

Do you make money from rental properties, mutual funds, or stocks? Then you also need to register for income tax! Any profits from capital gains, dividends, or interest may be subject to taxes. Investment profits are considered income and must be reported even if they are not your principal source of income.

If You Are a Professional with a Private Practice:

Independent contractors, physicians, attorneys, and consultants must also register for income tax. You must report that revenue if you bill customers for your services. Regardless of the size of your practice, you should register if your income exceeds the taxable limit.

If You Want to Apply for Loans or Credit:

Are you considering a loan to grow your business or purchase a home? Banks frequently request tax returns when processing loan applications. You may have trouble demonstrating your financial stability if you haven’t filed your income taxes. Having a clean tax record contributes to your financial credibility.

If You Want to Claim Tax Benefits:

Did you know that you can save money by registering for income tax? Filing your taxes is the only way to receive many tax perks, deductions, and refunds. Tax registration allows you to take advantage of these benefits, including medical expenses and house loan deductions.

If You Have a Pension as a Senior Citizen:

Are you retired but still getting your pension? Certain pension incomes are taxed while others are not. You might still need to register for income tax if you have several sources of income after retirement, such as assets or rental properties.

If You Earn from Foreign Sources:

You may still have to pay taxes in your home country even if you make money overseas from investments, a business, or a job. Although tax regulations differ, residents in many nations must report their worldwide income. You must register for taxes if you have international profits.

Concluding remarks

Income tax registration isn’t just for big businesses or wealthy individuals—it’s for everyone earning money above the taxable limit. If you want Online Income Tax Registration, contact Eazy Startups for the best guidance and seamless process completion.

Copyright © 2022 Easy Startups. All Rights Reserved